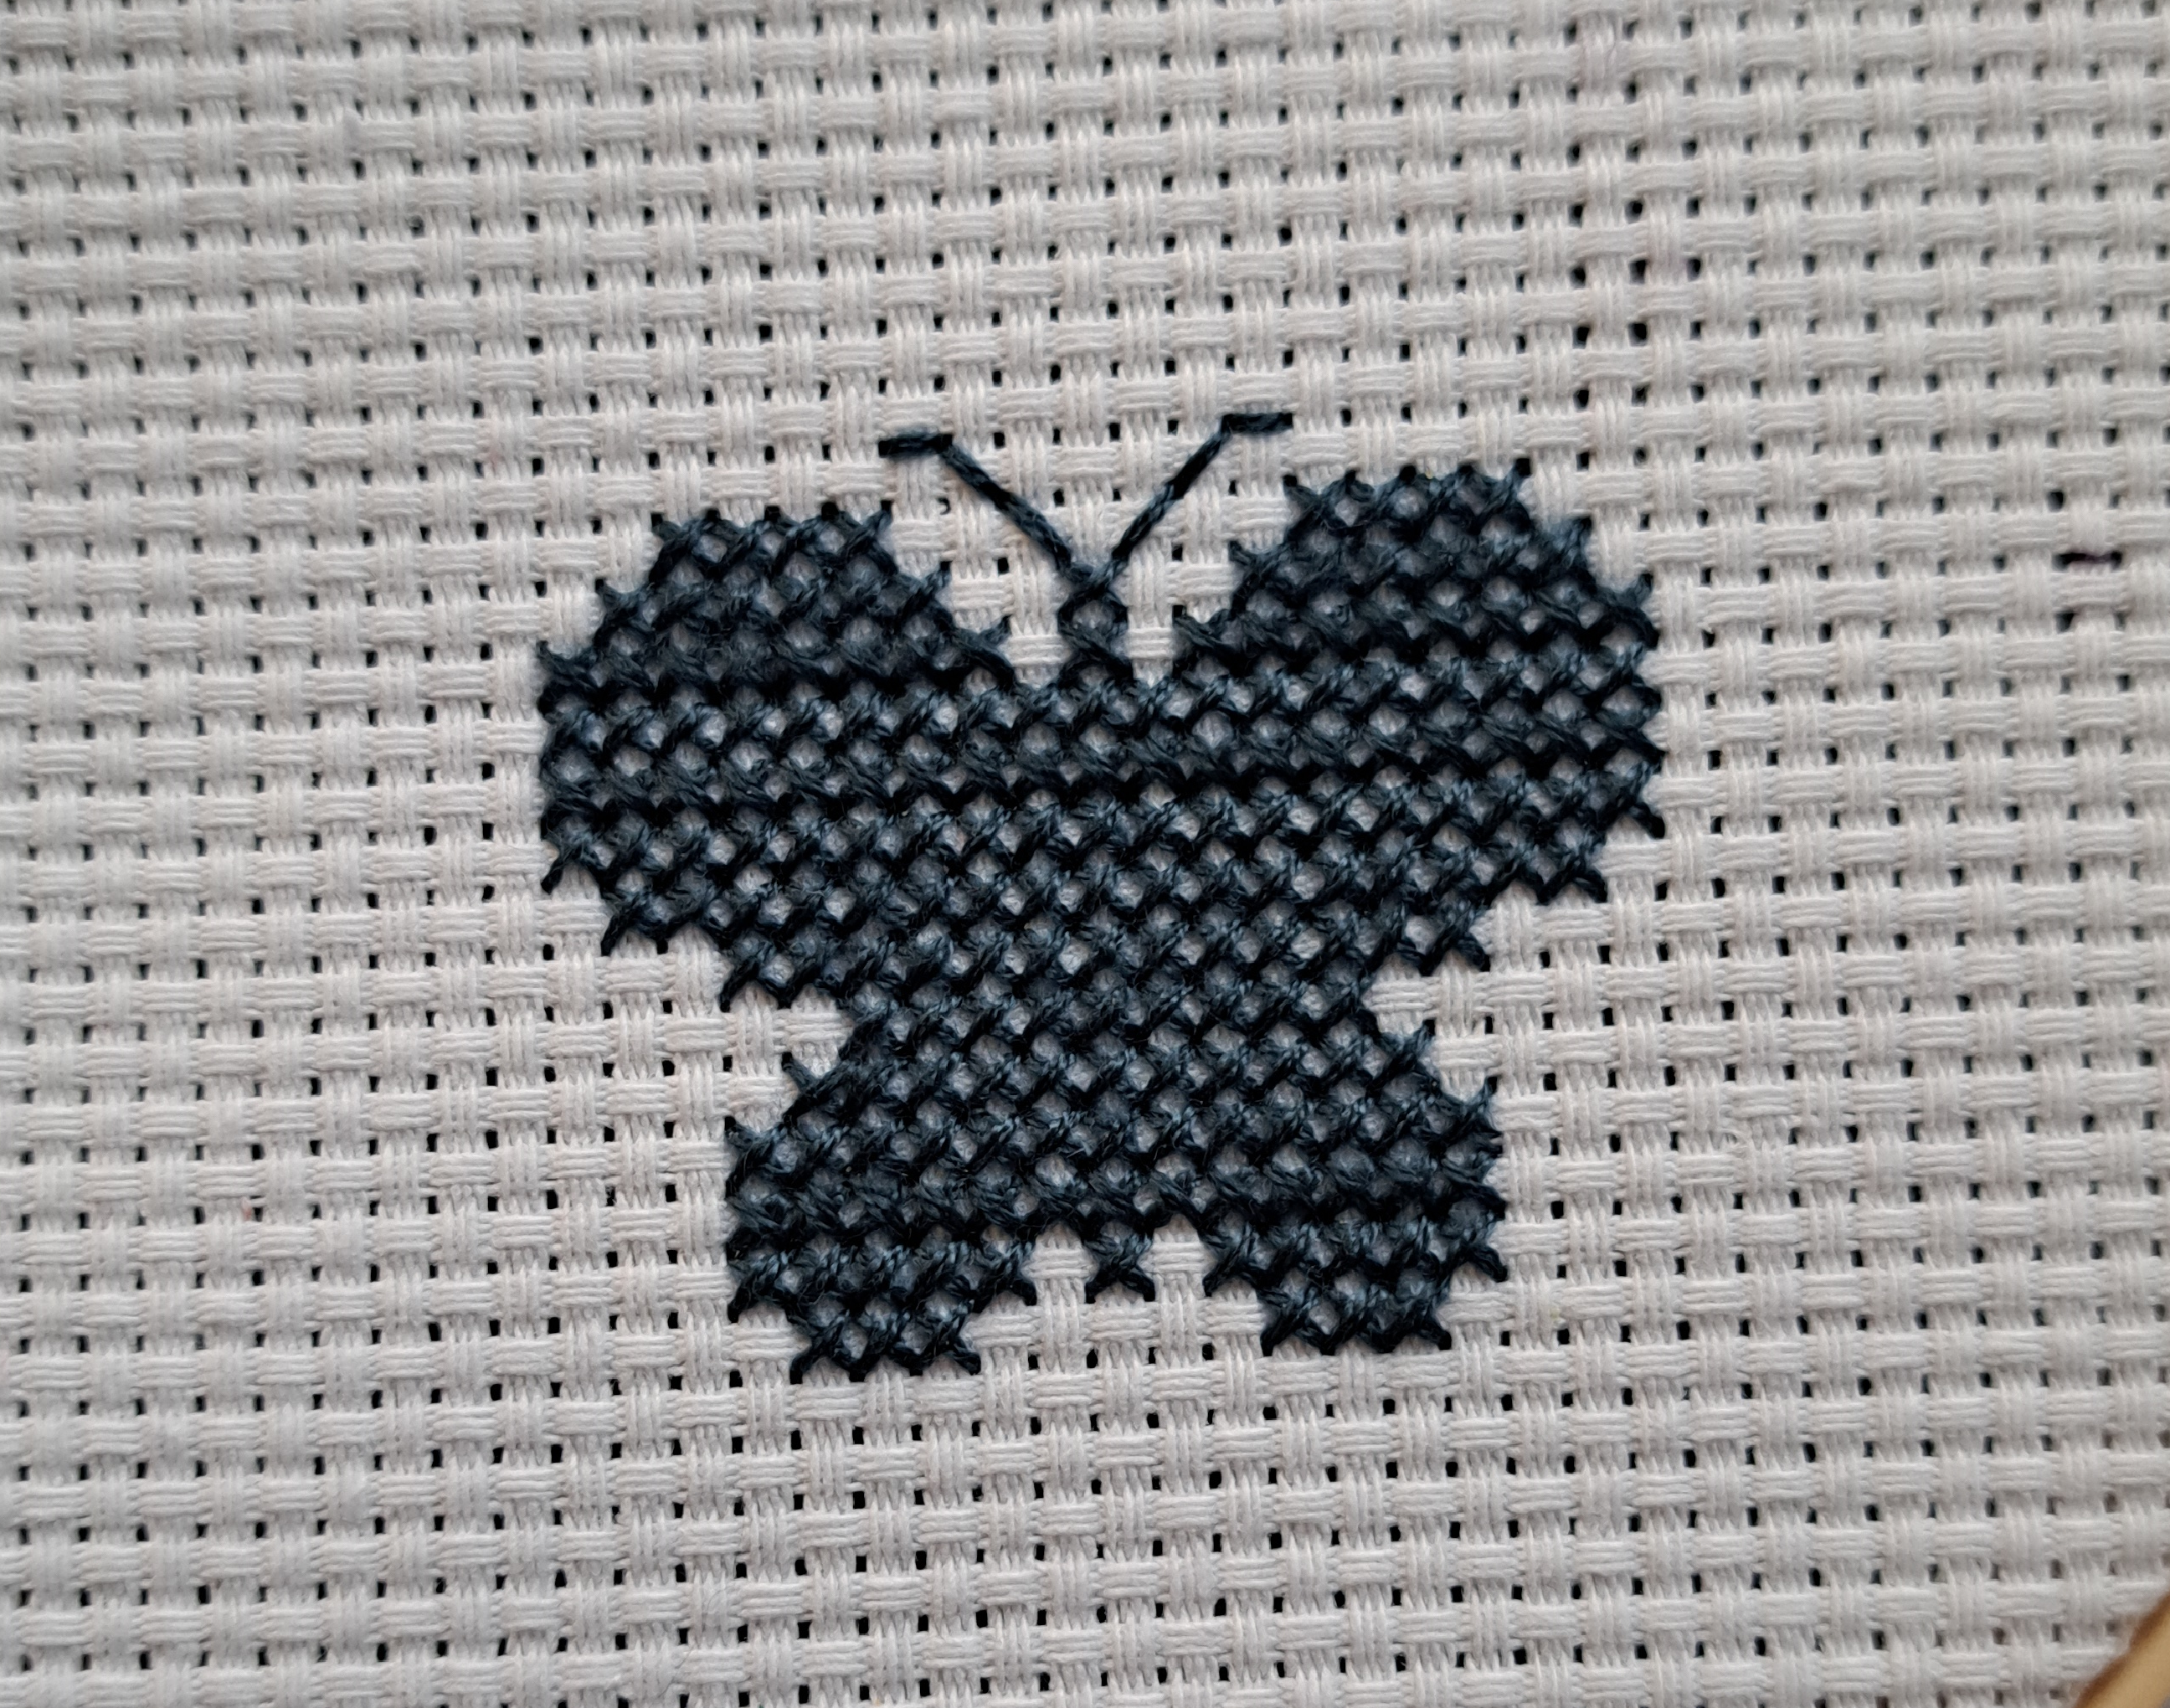
If you want to know how to embroider a butterfly, this is a good place to start. This is a simple pattern for embroidering a butterfly with step-by-step instructions. If you’re new to embroidery, it’s important to start with simple designs like this one to build your skills before moving on to more complex designs. Butterfly embroidery can be a wonderful and rewarding project, especially because it allows you to creatively use a variety of colors and stitches to bring delicate wings and intricate details to life. By following the step-by-step instructions, you can learn the basic stitches needed and practice your technique. As you gain confidence, you can explore different butterfly designs and further develop your embroidery skills. So, let’s grab our embroidery hoops, needle and thread and embark on this creative journey to bring a beautiful butterfly to life through the art of embroidery.
The beauty of butterflies lies in their subtle and complex patterns, as well as in a bright palette of colors. During the warm summer months, these elegant insects can be found in gardens, parks and meadows, adding a touch of charm to the natural world. Their presence is often associated with blooming flowers, as they gracefully perch on colorful petals to sip the sweet nectar.
Embroidering a simple butterfly can be an extremely soothing and fulfilling activity that will allow you to bring a touch of this natural beauty into your home. Creating the fine lines and colorful hues of a butterfly’s wings through embroidery can be a meditative and rewarding experience, nourishing not only your creativity, but your soul as well. Carefully stitching each detail, you can immerse yourself in the gentle rhythm of needlework, finding peace in the act of creation.
So, the next time you spot a butterfly dancing among flowers, maybe you’ll be inspired to capture a bit of that ephemeral magic through the art of embroidery, letting the beauty of these winged wonders flutter into your life in a new and wonderful way.
Equipments
- fabric
- needle
- thread
- embroidery hoops
- simple butterfly pattern
- patience
Instruction
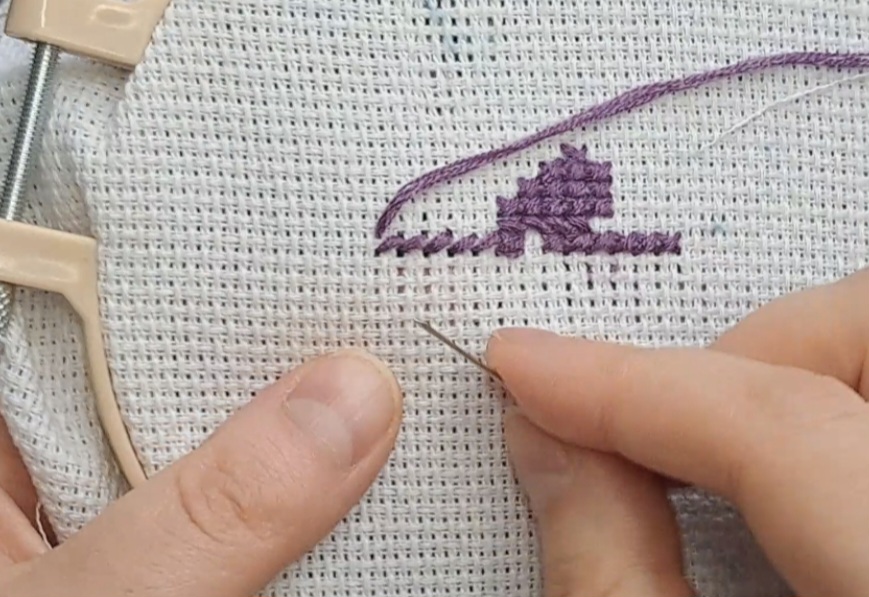
- Prepare the surface for embroidery by securing the fabric in the hoops.
- Pull the thread through the needle.
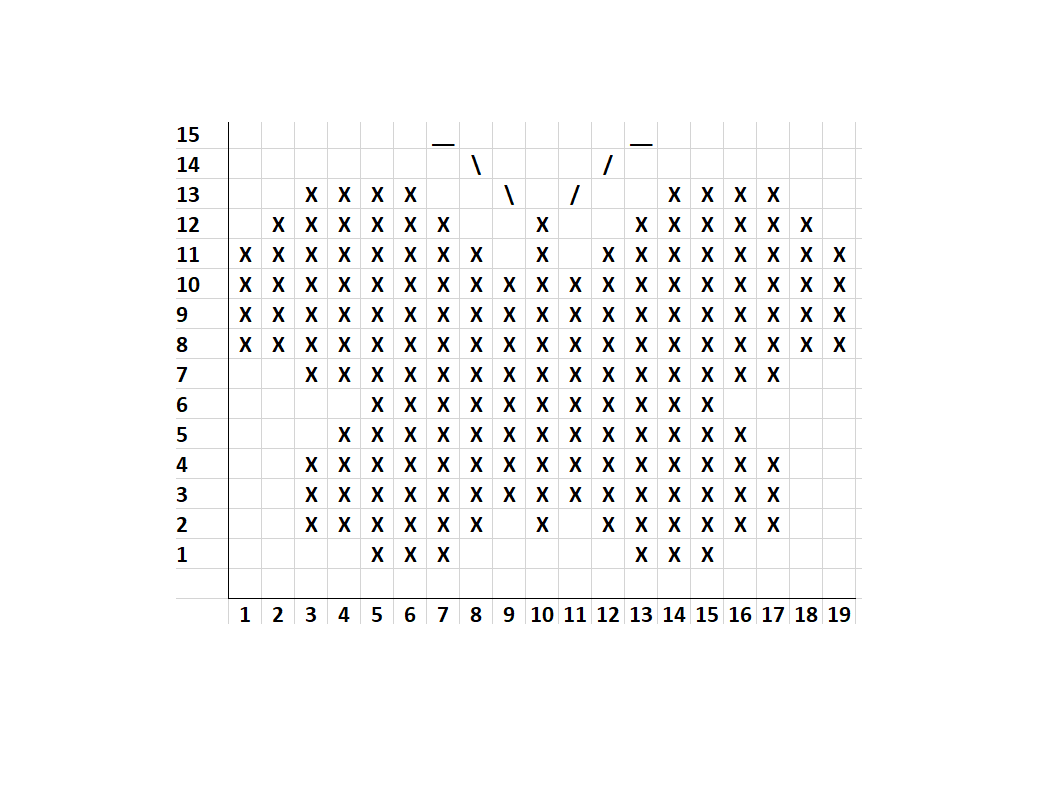
- Find the middle of the surface and start embroidering.
- do 3 half crosses to the left \ \ \.
- Count 5 crosses to let the space.
- Do 3 half crosses to the left \ \ \ again.
- Now it’s time to go back to the right side by doing 3 half crosses in the opposite direction / / /.
- Leave room for 5 stitches.
- Do 3 more stitches to the right.
- Now it’s time for the next row of cross stitch.
- This way you can easily continue embroidering by following the butterfly pattern.
If you want to get a comprehensive understanding of the topic at hand, it would be worthwhile to take some time to watch the entire work in the video below. By doing this, you will be able to understand the nuances and details that cannot be fully covered in a written or short format. A visual aid can often offer a richer and more engaging experience, allowing you to absorb content more fully. So, continue to delve into the advanced information that awaits you in the video presentation below.